Special moments are ..........
The rare occasions when I am actually in front of the camera
and not the one taking all the pics. I love love taking the photos and my fave ones
are when no one is aware of it - so natural.
So it is not often I have a photo of Hubby and I together.
It is a Special Moment and a Special memory, as it was taken at my Dad-in-laws'
60th Birthday Bash.
The "string circles" I used as a frame were circles I made using my glue gun and Glue sticks
I wanted something different and decided to try it. Check out the little mini tutorial below - I hope you try it out, you can make any shape and size.
I used the Spellbinders "Sprightly Sprockets" die set and cut out the gears 'n cogs on grey cardstock
I then sprayed them with Prima Bloom - Tea Stain for a little shimmer.
I used a few of the gears to create a stencil and inked around them to give the shadow effect on the layout.
I used the Kaizercraft Quarter stencil (Chevrons) and used white Distress Paint Dapper over the Stenciled Gears (Top right , Bottom left)
I cut out chevrons from scrap paper, used clock stamps, flowers, pearls and doilies to embellish the layout
I have entered this layout for the following challenges:
The colours, elements and embellishments used were inspired by the following challenges
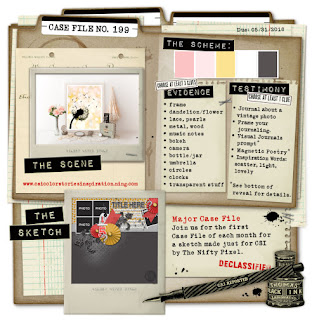
CSI case 199 -
CSI - Colour, Stories, Inspiration - Case File 199
I enjoyed using the scheme. I used
several of the Evidence: Frame, Flowers, Pearls,
Metal, Circles, Clocks and the Testimony.
MTW May Major challenge with the MOMENT and Clocks.
This is a Very special Moment, as photos of hubby and i are few and far between.
I love taking photos of hubby and my two boys together and everything they get up to.
Time goes by so quickly that we need to record these moments.
.The sketch from Scrap Africa #74 is what I used as the Layout.
I love clocks and gears - especially having boys in my life. The chevron was something
new to me to use, and i really enjoyed making them and placing them.
TUTORIAL
I created the vintage, string like circle frames with my Glue gun and glue sticks.

You will need Glue sticks, your Glue gun, Cardstock (preferably white) and a sheet of acetate.

I drew a circle template on a piece of cardboard and put acetate over
I then traced the circle with the glue gun - on top of the Acetate
MAKE sure you dont make your lines too THIN, because
when you need to lift the glue rings from the acetate, it will break.
Try make nice thick lines.
Once you have completed tracing your first circle with your glue,
Move the acetate sheet slightly over to create an overlapping circle.
Once you are happy with the position, trace the new circle with your glue.
When you are done you can move the acetate sheet again and trace another overlapping circle.
You can make as many circles as you like, keeping the centre as
the frame for the picture.
REMEMBER - You can make OVAL, Half moon and square shapes,
Even STARTS - single or overlapping shapes.
Once you are done and the glue is dry, you are ready to lift your creative piece off the acetate.
I usually use a blade to lift up a section, thereafter once you have a good grip, you can peel it off the sheet.
Just go SLOW
Don't worry of it breaks somewhere on the circle, you just heat up your Glue gun and stick it back together :)
I have made two circle frames
I then paint with Gesso, to make sure my dye sprays and /or
inks will stick to the resin.
My acryllic paints and distress paints seem to stick to the glue resin
without gesso.
Here are my two frames painted
The one I used Distress paint dabber - Picked Rasberry
On the other - I painted it with Gesso, Once dry, i then sprayed it with Yellow shimmer Dye Spray on one half, and on the other half, I inked it with Ranger Patena - Victorian Gold.
A few more pics to check out:
Hope you enjoyed - I really hope you try it out. If you do leave me some love in the comments and
let me know how it went, please post me some pics. Please feel free to share it on my facebook page:
https://www.facebook.com/ScrapSenSations-316313541751236
Happy Scrapping
Candace