Thursday, March 31, 2016

Thankful Thursday ...

Thankful to blessed with loving to scrapbook, thankful that my family is so patient and supportive of this hobby, thankful for the awesome ideas every one shares, thankful for the awesome photos I get to use in my layouts.

Today ... I am sharing more of my album pages i have finished.

Hope you like them and enjoy.

I will post as soon as i have some more done :)


Friday, March 18, 2016

Fantastic Friday ...

Hi all

Thank you for joining me on this lovely sunny day, we had awesome rain over the last 24 hours
and really grateful for it - For me ... It really makes Scrapping alot more enjoyable.

Today I am sharing my Mini Travel album with you

It is just the start and it does take time. I made the Album with Chipboard, and I  have covered and decorated the outside of the Album - for Our Trip to the UK - I can't wait :)

Front


Spine


I just love the foil technique - can you imagine the cards and tags you can make


Inside Cover


First Page - Just love the colour and the Celebr8 Chippies


Hope you have a happy Scrappy Weekend

Candace


Wednesday, March 9, 2016

Wacky Wednesday Share 


I found this Tutorial on one of my subscription emails from SplitCoast Stampers
and had to share this - this is an awesome tutorial to make your own stamps,
considering how expensive some of the basic ones are.

As you practice you can start making detailed stamps yourself

I'm pretty excited about this :)


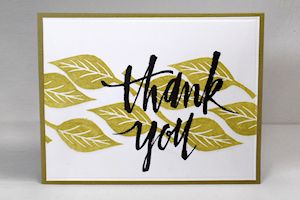
Stamp Carving Basics

by Dina Kowal


Learn the basics for beginning stamp carving.

Supplies

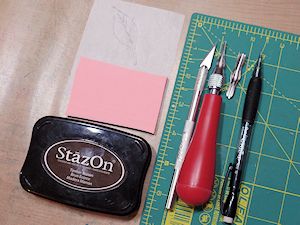
  • Stamp carving block (Speedball® Speedy-Carve recommended and used here)
  • Carving tools (Speedball Lino Handle and interchangeable cutter tips used here, 
  • including a small #1 V-gouge and #5 U-gouge blade)
  • Pencil (#2/HB or softer lead)
  • Cardstock, paper, or tracing paper
  • An image to carve
  • Sharp craft knife
  • Stazon ink
  • Scrap paper
  • Self-healing cutting mat
  • Other supplies as needed to complete the project (Versafine Onyx Black and Spanish 
  • Moss ink, Concord & 9th Painted Thank You clear stamp set, ScorPal, Bazzill Cardstock, MISTI)


Step-by-Step


  1. Step 1

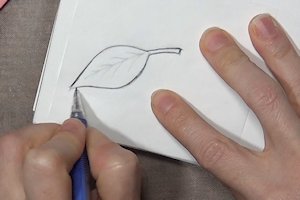
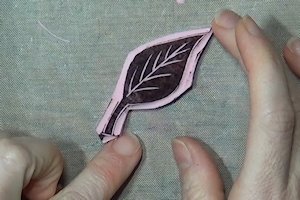
    Draw or trace a simple image onto a piece of paper or cardstock,using a soft-leaded pencil.

    Trim around the image with scissors.


    NOTE:

    If you are a beginner, choose a solid image with straight lines, broad curves and wide angles. As you practice, you will be able to progress to images with outlines and more details.
  2. Step 2

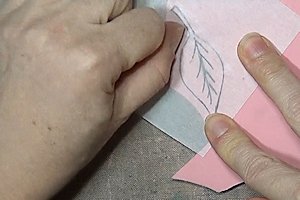
    Lay the paper with the image face down on the carving block. With your thumbnail, a bone folder, or other flat tool, burnish the paper so that the image transfers to the block. Take care to keep the paper still. If needed, touch up the image or edges of the transferred drawing with a pencil or alcohol marker so that it is clear and complete.
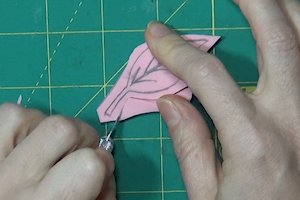
  3. Trim the carving block with a craft knife, leaving a 1/8" – 1/4" border around the image.

    NOTE:

    Images can be drawn directly onto the carving block, but remember that they will be stamped in reverse. Using a transfer method will allow the stamped image to return to the orientation in which it was drawn.
  4. Step 3

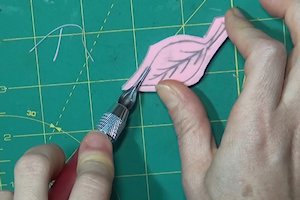
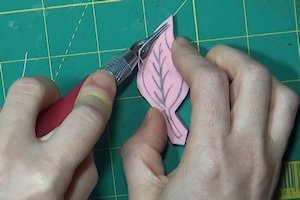
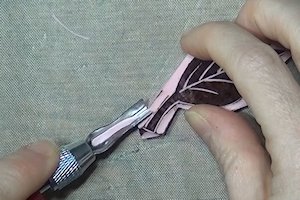
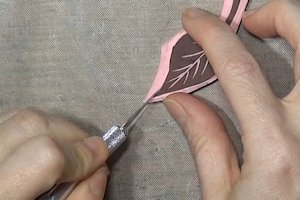
    Using the smallest V-gouge blade, cut around the outline of the image. Keep the flat back of the tip against the block to ensure that the blade does not dig into the block too deeply.

    TIPS:
    Work slowly and carefully.
    Cut from inside angles out.
    Always cut away from yourself, and watch your fingers!
  5. If cutting around a curve, turn the block to meet the blade rather than trying to turn the blade into a curved cut.
  6. Step 4

    Use the small blade to cut along any detail lines inside the outline as well.
  7. Step 5

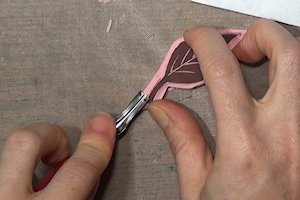
    Switch blades to a larger U-gouge tip. Cut away the excess rubber around the outline, leaving only the area that you want to stamp.
  8. Step 6

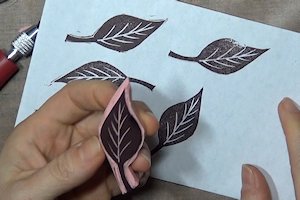
    Ink the stamp surface with Stazon ink. This will give a good idea of what surfaces of the stamp may still need to be carved away. Allow the ink to dry completely before proceeding.
  9. Step 7

    Keep carving away inked areas that are not a part of the stamp image. Take care not to undercut the image; cut at a slight angle away from the edge.
  10. Step 8

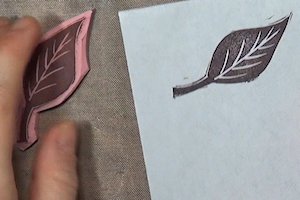
    Use a scrap piece of paper to stamp a test image. This will allow you to see which areas of the image will stamp, and indicate where adjustments are still needed.
  11. Step 9

    Repeat steps 7 and 8 until the image is trimmed to your satisfaction.
  12. Be patient and work slowly – you will need to stamp several test images as you go along, and keep making adjustments until all the excess rubber is trimmed away.
  13. Step 10

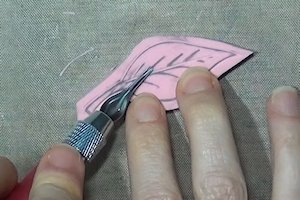
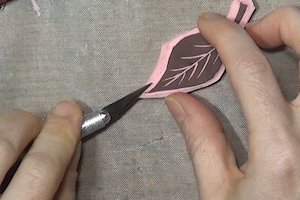
    To add very fine details and sharp angles, a craft knife can be used. Hold the blade straight up and down to go along the outline, cutting into the block about 1/16".
  14. To complete the cut, angle the blade 30-45 degrees, and cut down in to the first cut line from about 1/16" outside the first cut.
  15. Step 11

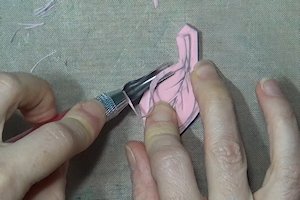
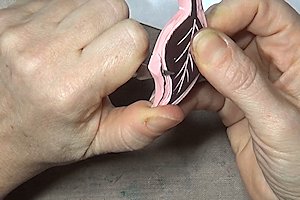
    Trim the edges of the stamp closer to the edge of the image with a craft knife, cutting at an angle.
  16. Step 12

    Stamp with the carved stamp as usual to decorate a card panel.


Read more: http://www.splitcoaststampers.com/resources/tutorials/stampcarvingbasics/#ixzz42OPx7E2R


Hope you try it out and have fun 

Best wishes 

Candace 

Sunday, February 28, 2016

Sunday Scrappin


Here is my creation today.

I was up so early this morning, so I decided to try something new (inspired by
Michelle Van wyk)


Supplies:

Modge Podge
Foil / Foil tape
Chippies
Dabber - Black Soot
Glue (your preferred adhesive to stick down the Chippies)
Black Acrylic Paint
Paint brush
Wet wipes
Ink Pad
Ranger - Victorian gold
Black Cardstock (you can use 30cm x 30cm - I cut mine to fit in my A4 Journal)
Embossing tool
Double sided tape for matting and photo


Adhere your chippies to the Cardstock


Here you can either use foil tape that is already sticky on the one side and stick
it down strip by strip.
I used Modge podge and kitchen foil -

Paint your cartstock and chippies with modge - press down on the foil 
to lay it flat over cardstock and chippies. 
Using an embossing tool or bone tool push down against the sides of the chippies, 

It will tear but it is fine - do it slowly as not to break off the foil

Take blobs of Black Acrylic paint and brush over the chippies
You can wipe as little or as much off as you like - your preference


I then dabbed some Victorian Gold onto an ink pad and dabbed it randomly
In the chippies and foil.

I then painted another chippie word with black soot and adhered it to the layout
I matted a photo onto back cardstock and placed it where it was flat.


This was quick and easy and I hope you try it out

It would work awesome for cards as well

Have fun and Happy Scrappin Sunday