Saturday, April 21, 2018

Friday Night Fun #4 - Shimmer and Shine

Hello Happy Scrappers

Thank you for joining me today, hope you are having a warm sunny weekend.

Spring is eventually here in the UK...


Friday night was fun night (last night) and I decided to try the Cosmic Shimmer 
Gilding flakes  and ....... Ooh la la.


I bought the Cosmic Shimmer Gilding flakes and the Flake and glitter Glue about 3 months ago and
I hadnt had a chance to try it yet.

This is definitely a product you need in your craft stash 😸

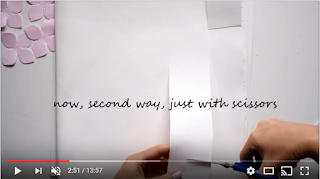
Here are my steps and a tutorial I have added for ideas on the Cosmic Shimmer 
Gilding flakes and what you can do with it.

I started with a cardboard cut to size to fit in my journal and painted it with
Black Gesso, or you can just use black cardstock.


I found the stencil I wanted to use for the background and got my Cosmic shimmer 
Flake and Glitter glue and Gilding flakes ready.


I put a blob of the Cosmic Shimmer glue onto my craft sheet and used a Mini ink blending 
foam to pick up the glue and put through the stencil.

Once done I removed the scotch tape holding down the stencil and removed it from the board.

Below is a picture of what it looks like. 

Remember the glue must be clear, if it is still white or have a bluish tint, leave it until
it is clear. You can get your work space ready and pull out your Cosmic Shimmer 


I then sprinkle Gilding flakes over the board and use a Texture sponge to spread it
and rub it in (Yes, I used my kitchen scourer - rough side- works like a bomb)


Once it is all rubbed in this is what it looks like below, clean, clear and beautiful.
It picks up the details amazingly


I then used this as the background to my creation below:
My Aunt and Uncle have been married for 43 years - how amazing is that !!


I added a Dreamcatcher Die cut, Flower ring Die, Tag die (cut on my little cuttlebug), some flowers (Big roses and small roses)

I inked the roses with Brown ink, Orange ink and Green ink.

I added some gold with Patina Victorian Gold with a dauber and Stickles Glitter glue.

I added some pearls and some ribbon.

and Tadaaa


The photo does not do it justice - the shimmer and shine of the Gilding Flakes.

Dont forget to check out the tutorial below of the uses of the Cosmic Shimmer Gilding Flakes.


Thank you for stopping by and hope you have a happy Scrappin' weekend

Loves
Candace

Monday, April 9, 2018

Preserved with Love + Tutorial

Hello Happy Scrappers

Hope you had an awesome start to your week.

Today I am sharing my layout I created  with photos of my Mom and
my boys.


I painted the paper with Clear Gesso and once dried I stencilled on the page with Texture paste


I then used Lindy's dye sprays: My mojito green , Whale watch blue

I stamped the background with a few of my texture stamps I have in my collection. 


I then placed stacked cardboard to adhere my photo mats to, which gives me an 
idea of where to place the ribbon, lace, embellishments and die cuts I cut on my 
cuttlebug (Butterfly , Leaves). 

I then made the ribbon roses and placed all the embellishments and flowers in place 
and adhered them. 

Here is the link to the Tutorial on how to make the Ribbon roses. They are quick and 
easy and you can make while you watch TV and biuld your stash. 


I used Lindy's dye spray on the roses to colour some of them blue.


and then I added some tranparent stickers from the FabScraps heritage collection (found in 
my sticker stash) and then lastly I added the beautiful photos (2017/03)


Affiliated links - click on the highlited product for ease of order and description .


Thank you for visiting my blog and I hope you feel inspired to make some ribbon roses and a beautiful layout. 

I have entered this layout in the following challenge - click on the image for details. Hope 
you are inspired to join in the fun. I loved the colour blue and was inspired by this and the 
flowers and blossoms.

 Mixed Media Place Challenge

Have a wonderful week ahead and happy scrappin'

Loves 
Candace 

Saturday, April 7, 2018

Friday Night Fun # 3 - Paper / Foamarin flowers.

Hello Happy Scrappers

Hope you had a lovely Friday evening and felt inspired to try and test some techniques.


I have a picture tutorial below on the flowers I made (using a metal die) and
dont miss the link below showing you how to make flowers without a metal
die..... stunning.

Remember you can use paper or foamiran


Here we go:

I die cut paper with a metal die and then coloured the petals with ink and dauber (centre)
and the edges I used Lindy's dye sprays.


Remember to colour the front and the back of the petals.

I folded the petals while they were still abit wet from the spray.
I fold the two petals onto the opposite two petals and then folded it in half
and fold the last petal in line with the others:


I then roll the petals into eachother gently and then give them a twist between 
my fingers


i then leave the rolled petals and carry on doing the same to the rest of the petals


I give the petals a quick dry with the heat gun and then unroll them carefully
I dont undo them so the petals are flat and straight, I try and leave the texture
the "roll and twist" has created.


I then use glue  in the centre of the petals (around the hole) and glue the layers
together (about 4 petals)


I then put stamens in through the centre of the flower and used 3D gel glue/ Silicone
glue around the stamens in the centre of the flower, to hold them in place. 

Once the gel / silicone glue is dry, I cut off the excess of the stamen pieces at the back 
of the flower. 


Now check out the awesome link below (click on image), where you dont need a metal die
to make these awesome flowers..... Just need scissors - QUICK and EASY


 Scissor cut flowers

Thank you for stopping by and I hope you enjoyed the tutorial and video. 

Hope you feel inspired to go give it a try... what you can do with these flowers 
is amazing.... Cards, Layouts and Mixed Media

Have a lovely weekend

Loves 
Candace 


Basket full of Easter

Hello Happy Scrappers

Hope you all had a wonderful week.

The weather has been lovely so far this weekend in the UK.


Today I am posting the Baskets we made in a class just before Easter.

It was such a lovely session and the ladies were so talented.

We cut out the basket templates and weaved the strips of paper and then glued our handle in place.

And then the fun began.... Flower making and decorating the baskets.

So here are a few of the baskets we made:


Here are some single photos and close ups


Remember these baskets can be used for all occasions.

Stay tuned for Flower tutorials up next.

Thank you for popping over

Loves
Candace