Friday, September 14, 2018

DEAR TO MY HEART

Well hello happy scrappers

And a big thank you for stopping by...

Today I am sharing my layout I created with the main photo in mind

Beautiful photo of my Brother, Sister-law and awesome nephew.


Products used: 

Die cuts - using black and white cardstock
Lace 
Resin embellishments
Flowers
Word stickers
Stencils


Process: 

1. Painted the pattern paper with Clear Gesso. Dry with heat gun


2. Sponged white gesso (diluted slightly with water) over the centre of the paper
    Dry with heat gun 


3. Stenciled with Black Gesso and White Modelling paste 


4. I lay out the embellishments and photos so I have an idea of where I want it all to go.
    I chalked the edges of the tags.


5. I adhered the embellishments and photos in place and added the flowers and words.
    I chalked the edges of the flower petals.

Here are some close ups: 


I really enjoyed putting this layout together - simple but effective


I have entered my layout into the 13@rts September challenge.

The mood board images and colour were inspiring and contributed to the ideas
of my layout.
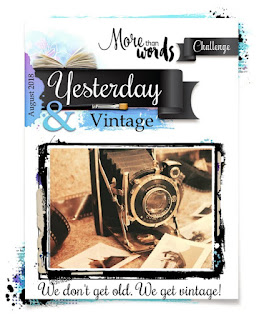
Please click on the image for more about the challenge and hopefully be inspired to take part.

 13@rts September challenge

Thank you for stopping by and hope you have an awesome weekend.

Loves 
Candace 


Wednesday, September 12, 2018

THIS IS WHAT TRUE LOVE ... LOOKS LIKE

Hello Happy Scrappers

Hope you are having an inspiring week.

I wanted to share my latest layout with you, it means so much to me.


This lay out is about True love.....

My hubby and I have known eachother since we were teens - first love
and this became ......True Love

I have used a photo of when we were teenage sweethearts and now one of our latest
photos after 19 happy years of marraige -

I saw the challenge on Lindy's stamp gang Blog and loved the colours -
Click on the image below to visit the challenge and see the amazing creations.

 Lindy's September challenge


Here are the details below......

Products used: 

Lindy's Guten Tag Teal Magical Shaker
Lindy's Poppin pink magical
Lindy's Mission Bell Brown magical
Studio acryllic White Gesso
Studio acryllic Black Gesso
Studio acryllic Modelling paste
Liquitex Gel Medium
Metal Die cuts - Clock time, mesh, fence, background, leaf swirls, Letters
Sheena Douglas stencil - A floral note
Flowers - I made these using Foamiran
Imagination Crafts Artsy stones - Small
Stamps - various
Versa Magic Black ink
Resin Frame


Process: 

1. Brushed white gesso on the background paper
2. adhered two pieces of torn pattern paper using Gel medium
3. I mixed Magicals teal with  white Modeling paste and applied to the  Floral note
    stencil randomley on the page as well as white Modelling paste.
4. I randomley stamped some images and words on the page with Black ink.
5. When the ink was dry, I painted the page with clear gesso.


6. I mixed some Magicals Poppin pink with some water and applied to the focal 
    points on my page.
7. I placed my die cuts and photos on the page to get a feel of how I am going to lay
    it out.
8. I used the left over poppin pink liquid with white gesso and painted the die cuts.
9. When the die cuts were dry, they were abit too bright so I mixed a very little Magical
    Bells brown with water and brushed it over the Pink die cuts to tone down the colour.


10. I added strips of torn carton and coloured with Poppin pink magical and highlited 
      white Gesso.


11. I decided on the layout of my embillishments and photos and adhered it all 
      in place. 

12. I added the Foamiran flowers that I made with white foamiran and coloured with 
      Teal Magicals.

13. Lastly I added the small artsy stones with gel medium.

Here are some close ups


Thank you for stopping over and letting me share this with you 

Wishing you an awe inspiring week ahead.

Loves
Candace 


Friday, September 7, 2018

Friday Night Fun #9 - Old World Charm

Hello Happy Scrappers

Hope you have all had a wonderful week.


I have been looking so forward to this weekend, so I can update my blog.
It has been a very busy month and I haven't uploaded any projects... sorry.

It has been getting cooler this week, so no better time than to snuggle up to the
laptop and load some posts.

Today I am sharing my Journal page I created after being inspired by Pascale B.

So to no further ado...

Products:
13@rts White Gesso
13@rts Black Gesso 
13@rts Gel medium
Finnabair Crackle paste
Lindy's Magicals - Mission bells brown
Lindy's starburst sprays: My mojito green, Whale watch blue, See grass green, 
                                        Clam bake beige
Fabscraps - Heritage clear stickers
Sheena Douglas Stencil - A floral note
Various stamps


Process:

1. Paint the journal page with white gesso
2. Use gel medium to stick down torn pages of books and strips of pattern pattern
3. Using various stamps, stamp some images around your focal area.
4. Paint the journal pages with clear gesso and dry with heat gun
5. Use the Floral note stencil and the crackle paste on the page. Let dry
6. Sprinkle magicals Mission bells brown on your craft mat and add water,
    use a brayer and roll through the mix and onto the journal page
7. Spray the starburst sprays on your focal area and dry with heat gun
8. Stick down ephemera images and black cotton using gel medium.
9. Use a brush and your starburst sprays and add some colour to your ephemera.
10. use some black gesso and add some splatters
11. Stick down your photo/image with double sided foam tape.
12. Lastly add some word stickers to decorate

and wallah...


Here are some close ups for you


 We were visiting Cheltenham over the August long weekend and on the way back home,
 we stopped at a view little villages - We came accross this amazing little building
So quaint - So Vintage


I have entered the journal page into the 13@rts September Challenge
I fell in love with the moodbaord and inspired the colours I used for my page.

Please click on the link below to join and have fun and also be inspired by all
the inspiring creations.

 13@rts September Challenge

Thank you for joining me and I hope you were inspired

Loves
Candace


Monday, August 20, 2018

Remember - Life is Beautiful

Hello Happy Scrappers

Hope you are all well and scrapping away with all the wonderful inspiration around us

Today I am sharing a layout with you that I created inspired by the More than words Challenge :

Challenge: Yesterday and Vintage

When I read this challenge, the word Yesterday reminded me of days gone by. When vintage was included I immediatley thought of my mom's parents. She had beautiful black and white photos of her Mom and Dad ( my Nonna and Nonnopa). And wow, what beautiful people they were.

Please click on the More than words challenge image below for the rules and inspiration.

I hope you all join in.


Now to the lay out:

Products used:

Various stamps
Die cuts (cut on my #Sizzix)
Dew Drop inks: Brilliance - Galaxy gold, VersaMagic - midnight black, Jumbo Java
Embossing powder: #Colorbox  Papermania - Seafoam white
Lindy's magicals: Mission bells brown
Embellishments: paper cut outs, wooden frames, flowers
Clear Gesso
Embossing ink - Emboss clear


I painted the entire page with clear gesso. 
I then stamped the background with various stamps
I used a stamp in the top corner of falling reeds and stamped it over and over 
I then used Embossing ink and stamped little flowers on the black "bush" on the top left and 
at the bottom with "life is beautiful" then heat embossed with Seafoam white. 


I tore up some scrap paper and inked the edges with dewdrop inkpad, initially with brown
and then slight touches with black. Added a little bit of black splatter


I arranged my photos and embelishments and adhered them in place and finished off 
with some white splatters 


Here are some close ups


Please click on the Image below and join in the fun. 

 More than words - August challenge

Thank you for stopping by and wish you all a very happy scrappy week ahead 


This post includes affiliate links 

Loves Candace


Friday, July 20, 2018

Friday Night Fun #8 - Metallic Wander

Hello Happy Scrappers

Hope you all had a wonderful week and it was full of inspiration.

Today I am sharing my Metallic project with you. This is so much fun..


You just never know how much fun it is going to be and how far you will go...

So to start I grabbed a Canvas, 13 arts Black Gesso, Silver Metallics paint,
13 arts Metallics Bronze and Lindy's Magicals - Bachelor Button Blue,
Lace doilies, beads, embellishments and flowers and 13ARTS Gel medium


I painted the Canvas with black gesso
I cut out the round patterns of the crochet doily and strips, I glued them onto the canvas
I then painted the lace/doilies
Then placing the embellishments where I wanted them , I glued them down with Glue
I like to use Bostik - all purpose clear glue as you can move the embellishments
around until they fit where I want them. You can also use a glue gun.


While the Gesso dried, I painted the flowers with black gesso and let them dry.
You could also use Lindy's Magical - Blazing black with a little water in a spray bottle, this would be easier to get into all the crooks and crannies of the flowers (depending on the type of flowers
you are using)


I then used the Gel medium on the long strips of the lace and added beads.

You can use Finnibair 3D stones or Craftbox texture stones


I added some more embellishments and then painted it all with black gesso
I made sure all the embellishments and lace were properly coated.

I glued down my black flowers


My canvas is now ready for the Metallic effects.

I put a little silver mettalic paint in a pallet and added a sprinke of Magicals - Bachelor Button Blue
You can add more magicals depending on how intense you want the colour

I used a dry brush and painted lighlty over the lace and worked from the bottom up.
I wanted the Bronze effect more concentrated at the top.

Once the Blue Metallic paint is dry, I then used a paint brush (or you can use a sponge)
and brushed the beads with the Bronze Mettalic paint. I then painted the main flower
with Bronze and then worked it over the Blue metallic paint, highlighting the tops
of the embellishments and smaller flowers.


So quick and easy and you can make any colour you want, even on a different colour
background.

This would make lovely Decor or even gifts

I hope you enjoyed it and find inspiration for this weekend.

Thank you for poppin over

Loves
Candace


Saturday, June 30, 2018

Sea Shells by the Sea Shore

Welcome back happy Scrappers

Hope you had a wonderful week full of inspiration and creativity

Today I am sharing my Layout I created when we travelled to the Sea

I love the sea, I love watching the waves roll over the sand and the sound is so
calming.

But back to the layout....

As mentioned in my last post, I created the Sea Tags and used them in my layout.


First I stamped the background with some stamps: Clocks, Script, Postcard and Steampunk 
Hotair balloon.


I then painted Clear Gesso over the whole page.


I then used Lindy's Starburst spray: Whale watch blue and I added splatters 
of Ranger Distress Paint and rubbed some with my finger in some places.


I coloured the printed Seashells and Seahorses with Lindy's Magicals: Mission Bells Brown, 
Bells of ireland Green, Yellow Rose of Texas and Lindy's Starbust Spray: Whale watch Blue


Embellishments: I used Dry moss (white), Doilies, Die cut swirls, Sea Tags (see previous post), Flowers - Large Roses  and Small Roses and Lace and I then prepared the layout to 
see where Iw as going to place everything. 

I then distressed the edges of the photos and inked with Distress ink - Vintage photo. I matted the 
photos onto brown cardstock and distressed the edges as well and inked the edges with
Distress ink - Vintage photo

I coloured the floweres with Lindy's Starbust sprays: Cosmopolitan Pink, dried the flower and 
used My Mojito Green with a thin paint brush to wipe the edges of the flowers - 
Beautiful shimmer.

Once I adhered all the elements in place I used Rangers Liquid pearls to add accents to the 
seashells, seahorses and Starfish.


I followed the same steps for 2nd layout below


Here are some closeups:


I think the colours turned out awesome. 

I entered Layout 1 in the More than words Monthly challenge. 
Clickon the image below for full details and for inspiration. 

 MTW Main June Challenge


Thank you for stopping by and visiting. 
Please feel free to leave comments or if you have any questions. 

Wishing you a wonderful weekend and lots of creating. 

Loves 
Candace