Monday, July 31, 2017

She is ..... MOM

Hello Happy Crafters

Welcome back and thank you for popping in.

I have had a few posts this week, as I had a few projects I wanted to share and
found awesome competitions to enter and boy oh boy.... when I started creating
I just couldn't stop 😁


This is a mixed media creation in my Journal.

I was dying to try my Black Gesso and this gave me the perfect opportunity. Inspired by the
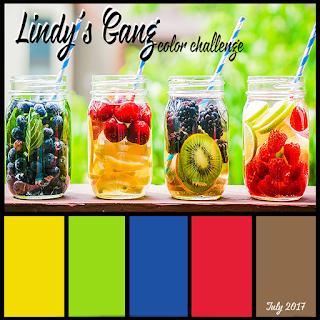
challenges - please see the images below of who is hosting the competitions and click on it
to find your inspiration.

This was created with my Mom in mind. Miss her stacks as she is still in SA.
I was inspired by the Mixed media Place Challenge and incorporated elements for the other
challenges that challenged my abilities and colour mixing.


I started with a blank journal page (I previously attempted a technique on this page and wiped it
off, and i used it because I knew it would be covered) This is why I love my Crafti Journal so
much, its my book of attempts.


But lets carry on .... I found some chippies and die cuts in my stash and glued them down
with Ranger Multi Medium - Matte.
I used 13@rts - Acrylic modeling paste with two stencils I bought in SA #CELEBR8PRODUCTS.


Once the paste and glue was dry, I painted the entire page with Black Gesso.
I painted it twice with Black Gesso to ensure everything was covered - Remember to make sure the first coat is dry before applying the second coat. You can use your Heat gun to speed up the process.


Now we are ready for the colour fun. I painted the centre-ish of the page with White Gesso, to ensure
my colours come out bright.

I then sprayed with Lindy's Luminous Lemon Flat Fabio spray, I also used Lindy's Magical Yellow Rose of Texas to add some shimmer and different tones of Yellow. I then used Distress Dabber - Broken China, I also used a little of Lindy's Magicals - Bachelor Button Blue, to add shimmer and
different tones of Blue.


I rubbed on a little Primary Elements Arte pigments - Blue, this gives quite bright shimmer - Lovely to accentuate background texture. I also rubbed on a bit of Bronze touch n go to add some more effect.


Now for my Chippies, die cuts and Embellishments....


I painted the Chippies and embellishments with either White Gesso or Black Gesso.

For the Window Die cut I used Distress Dabber - Broken China , and I used Lindy's Magical Bachelor Button Blue to add highlights. I then covered the whole die cut with Plaid Dimension glaze. When it was dry I added a photo of my Mum.


For my leaves, I painted them with Distress Dabber - Broken China , and I used Lindy's Magical Bachelor Button Blue to add highlights and I added more to the one set of leaves to make it darker.


I then added Microbeads to the little leaves and add the Lindy's Magical Bachelor Button Blue to add more depth.


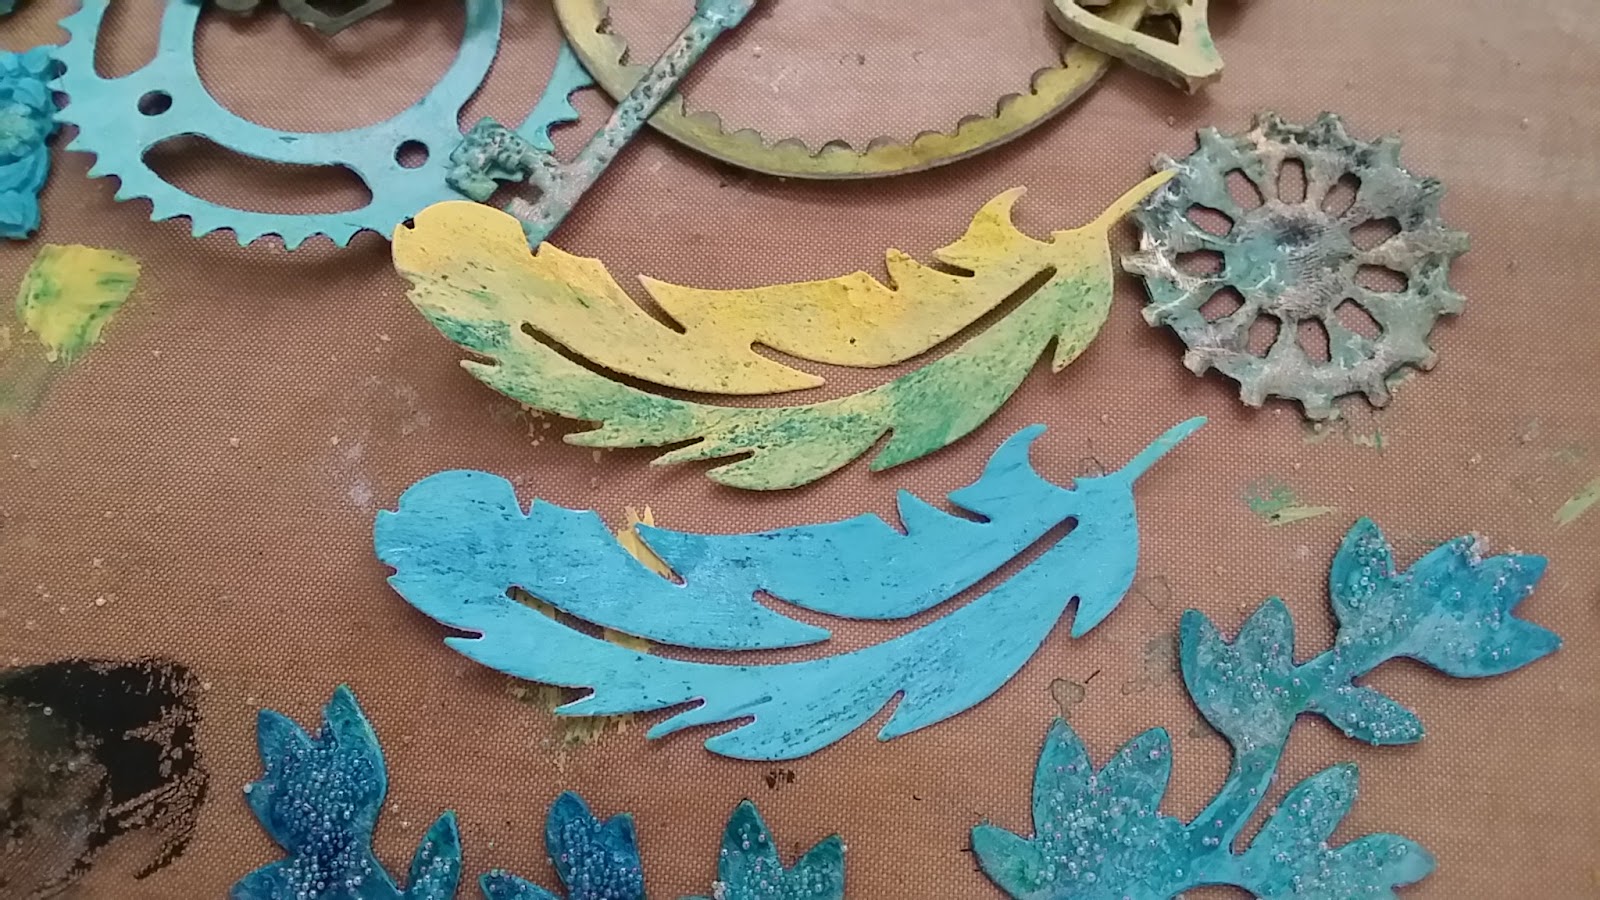
For the Feather die cuts...
I used  Yellow Acrylic paint and added Lindy's Magical Yellow Rose of Texas with a paintbrush with a drop of water to gives texture, impressions to the feather.
I used Distress Dabber - Broken China on the other feather and used the Lindy's Magical Bachelor Button Blue  and brushed this over with a drop of water to add more depth to the blue feather.


I used the same technique for the yellow heart chippies.

For the Gear and the Key , I painted it with Distress Dabber - Broken China and covered them with Dimension glaze. I didn't cover it completely, so when it dried it had quite a bit of texture. I then dabbed the die cuts with black ink, to fill the holes and then wiped the die cuts so the black ink only remained in the "holes".


I then used Ranger Patina Victorian Gold and dabbed it randomly on the die cuts to give a metal vintage feel.


I then used Lindy's Magical Bachelor Button Blue mixed with water (remember these powders are intense with colour, so you only need to add a touch to water , the more you add the more intense the colour) While the Resins (These were made using the mould and glue gun - click on the word) were still slightly wet, I dipped a dry brush in the Lindy's Magical Bachelor Button Blue and brushed over lightly to highlight some sections.


My favourite embellishment to alter was the Die cut Dragon fly.
I painted it with Distress Dabber - Broken China and I painted the centre with White Gesso. I then added Lindy's Magical Yellow Rose of Texas (mixed with a dab of water and painted over the dry Gesso) I then added lines on the wings with Plaid Dimension glaze. Once this was dry, I added Sequence - About three Yellow pieces over the top section of the body and Blue sequence on the tail. I then mixed Lindy's Magical Yellow Rose of Texas with the Plaid Dimension glaze and dabbed it over the sequence from top to bottom.


I then placed all my embellishments in the order I wanted and and used Ranger Multi Medium - Matte to glue them down. I found with all the dyes and paints used, this medium adheres the embellishments very well and does not allow the chemicals from the dyes and paints to interfere with the adhesion.


I added another photo of my Mum and some more Microbeads I added some extra medium blue beads randomly and lettered beads "MOM" . I brushed "MOM" with some Lindy's Magical Bachelor Button Blue to give it a more Shabby chic effect.

To finish off I added some yellow twine that I dry brushed with Black Gesso. I added Small paper roses - I wet them with water and then dipped moist paint brush into Lindy's Magical Bachelor Button Blue and brushed of the edges of the roses for the blue ones. I did the same with the Yellow one, using Flat Magicals - Luminous Lemon.


I have entered My Creation in the following Challenges - Please click on the images to visit the Challenges and check out the awe inspiring creations by the DT's.

 Lindy's Gang Colour Challenge

 Mixed Media Monthly Challenge #38 - July

 Mixed Media Place July Challenge

Thank you so much for popping in and I wish you a Creative week ahead.

** Don't forget to click on the products to find where you can get them (hyperlinked)

Happy Scrappin'

Loves
Candace


Saturday, July 29, 2017

Just LIFE

Hello Happy Scrappers 

Thank you for joining me again here on my Blog. If this is the first time you are 
stopping by, hope you enjoy what you see and take some inspiration with you.

Today's Post is about LIFE. 


It is quite surprising when you sit back and realize Just how time flies. 
How quick LIFE has gone by..... how quick the children have gone from 
Toddlers to Teens 😔

My Single page layout is Just about LIFE. My photos i am going to add are of my two 
teenage boys. And I am going to print them in black and white and mount them onto 
the black cardstock. 


Here are a few more photos, and a list of what embellishments I used and the 
techniques. I altered my embellishments quite a bit. 

I used the Fabscraps Shabby chic paper as the background - love the wood features.


I painted most of the page with White Gesso.
I then used Lindy's Stamp gang sprays and Magicals (Yellow rose of texas, Bells of Ireland green, Luminous lemon, Canna lily Burnt orange, Cest la vie cerise 
I then used the a water drop stamp and the compass stamp with Memento Tuxedo Black
I used a stencil with Gears and Cogs and used Distress Ink - Barn door
I then found some scraps of paper in the same colour range of Orange and Turquoise.
I tore these into strips and chalked the edges with Black ink. and layered them.
I took a few Pieces from the Tim Holtz Thrift shop Ephemera pack and added it in 
between the layers.
I then used the above stamps again over the layers of paper. 
I die cut some Gears on my Cuttlebug in Black cardstock (220gsm and thicker)
I stuck the black die cuts in between the layers of paper and on top in some places.
Once i was happy with the lay out, i stuck everything down. either using double sided tape
or my Fav Glue - Aleene's Tacky Glue
I then used some white Acrylic paint with a thin paintbrush and created some splatter.
I cut out the photo mats and used Foam tape to adhere them to the page.
I have now created a whole new background and ready for the photos but wait.........

Now the fun begins.

I then raided my metal embellishment stash and stuck down a whole lot of them 😉
The metal embellishments were silver, bronze and gold. It didnt matter to me as i was going to change them
Once I had glued them down, using the tacky glue as previously mentioned (works really well), I then
Its a pity the photos don't show this properly though.
I then added some Metal clock piece embellishments as the last step.


I painted all of the embellishments with Black Gesso.

Once dried, I used Ranger Patina Victorian Gold, and stamped this over the embellishments. But I

did not cover them completely, just to highlight the embellishments.

I then dry brushed the embellishments with Blue acrylic paint and dabbed a few with orange acrylic paint.


I was enjoying making this layout so much so, I forgot to take photos in between the 
steps 😲


I have entered this layout into the following competitions: 

Please click on the images to get the full details of the competition and check out the awe
inspiring work by the DT's and hopefully you will also feel inspired to enter. 

 Mixed Media Monthly Challenge

 Lindy's Gang July Colour Challenge

Thank you for stopping by 

Wishing you all the best and happy scrappin'

Loves 
Candace 


You & Me

Hello Happy Scrappers

Thanking you for coming back and joining me for this post.

This is one of my favourite Layouts.......


I created this layout as it was our 18th Wedding Anniversary not so long ago and
with our move to the UK and all the places we have been, I wanted to create
something really memorable. So...... I took Selfies of Hubby and I (which I
don't normally do, as I prefer being behind the camera), on trips and at special places.

These "Selfie" photos are the ones I am going to use for this Double page layout and I am printing
them in Black and White.


What I used:

White Texture past  - for the background and I coloured some of the Texture paste
Circle Template (with Texture paste)
Doilies (small ones  and I cut the edge off the large ones to create the frill)
Large roses
Small paper roses - Ivory 
Gears Metal Embellishments
Clock pieces Metal Embellishments
Butterfly metal embellishments
Chipboard Embellishments -
                           "Together" (Celebr8-South Africa) inked with Tim Holts Distress Ink (Gathered                                                        twigs and Rusty Hinge)
                            "Forever"   - Chipboard letters
                            "Frame"  -  in my stash
                           "Bicycle with clock wheel" - In stash
Cream silk ribbon
Flat back pearls - Ivory
I coloured the silver metal embellishments with Ranger Patina - Victorian Gold
Black Gesso to create splatter spots with thin paint brush
White transfer "YOU & ME"  #CELEBR8SA
Clear Gel Glue - Aleene's I love this glue -
Double sided tape


I  hope you find this inspiring

Thank you for visiting.

Happy Scrapping

Loves
Candace


Sunday, July 16, 2017

Dream to your Art's content

Hello Lovelies

Hope you have had a lovely few days and finding inspirational in every moment, feeling,
colour and emotion.

I created this in my Art Journal to try out/ experiment - Just love doing this.

Whether it works or not its my creative experience.

I really really like how this turned out and I hope it inspires you too.


I love how the colours turned out.

I used some metal charms and paper flowers and old paint brushes.

I used chipboard letters and bits n pieces I found in my scrapbook stash.

I even used a piece of  crepe bandage that I painted with Gesso and tied around the brushes.


Here is my blank canvas - I stuck all my embellishments down and painted about two
layers of white Gesso - maybe three just to make sure

Once this was all dry, I used my Dye ink sprays and a touch of Acrylic paints to
enhance some aspects.

I then added a quote that i just think is so positive and inspiring - I read it when I
was a teenager and I have just never forgotten it. I always think of it and especially
when I started crafting/ Scrapbooking it really meant a lot.


Hope you enjoyed and really make the time to try it out.

Use your bits from your stash, try blending your favourite colours and have FUN

Thank you for joining me and Happy Crafting


Loves
Candace


Sunday, July 9, 2017

Shimmer Whimsical

Hello Happy Scrappers

As promised a few posts ago (shocking how time flies) here is my Shimmer
Journal page I created.


I stuck down some chippies and letters and lace bits and painted it with
white Gesso. I painted two base coats of Gesso to make sure it was covered
properly.

I received a 1oz bottle of Vivid Ultra-metallics Multi surface acrylic paint - African Jade,
in the Mixed media CarftBox. it is more of a tint then an actual acrylic paint. I mixed some
with Blue acrylic paint, Yellow acrylic paint and Green acrylic paint. Pastel colours. It gave
such a beautiful shimmer to the paint.

I also tried mixed some Dala Metal craft paint with little dollops of Acrylic paint and it also gave an amazing shimmer and does not really affect the actual colour.

Unfortunately the photo does not do it justice.

I used the Green paint on the edges and used the Blue paint in the centre and blended with yellow.

I used White Gesso afterwards to give it a vintage look.

Here is a close up.


I then painted two chippie swirls and a circle in white and placed it in the centre.
This is for a photo of our home.

I was inspired by #MAREMISSMALLART - https://www.youtube.com/channel/UC5emavRXLyEVkLyU-PCGc3Q

Very inspiring and such wonderful tutorials - this is my Heroin

 I hope you also go and experiment and push your creative limits.

Have lots of fun.

Happy Scrappin'

Loves
Candace


Monday, July 3, 2017

Happy Fathers Day ... 2017

Well well ... can you believe it was Fathers day already.

Half way through the year already.


Just a quick share of the Father's day Card and cute gifts we made for DAD.

My boys enjoyed it and thought it was so cool.

Something so simple - means so much.

Great idea for Fathers day or Birthday.


Thank you for popping in

Hope you enjoyed

Hope you are inspired this week with creativity

Loves

Candace

HOPE Mixed media Class

Lovely day Crafters !!


Hope you all enjoying the weather and scrapping. Hope you have been up to a lot lately.

I taught a class a few weeks ago ....

HOPE - Mixed media on Canvas


Teaching a few techniques -
Stenciling with Paste
Stamping in Paste / Gesso
Applying Gesso to embellishments
Using dye sprays and inks and mixing it all up.
Using products at home.
Using your glue gun to make resin moulds
Painting and experimenting.
Layers on layers

Boy oh boy, so much fun.

Pretty scary how a room full of woman can get so quite :))

Here is my Creation ... and the ladies used this as a platform for their creations.


Amazing how beautiful the creations came out

So talented and they thought they didn't have an artistic bone them them - Ah!!

Happy Crafting lovelies

Chat soon

Loves
Candace