Monday, December 30, 2019

Be You - You inspire

Hello Happy Scrappers

I hope you have all had a wondeful Christmas πŸ’žand may the new year bring you health,
happiness and many hours of crafting joy😁

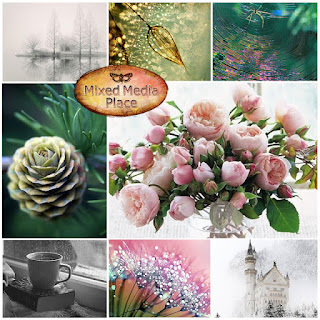
Today I am sharing a Mixed Media creation that was inspired by #Mixedmedia challenge.


I love the colours used in the Moodboard - so peaceful and delicate.

The details of the competition are below, please click on the Moodbard - December Challenge,

So please join me below for my little tutorial and I hope you are inspired to join in the fun.

To begin....

I used the lid off of a Fruit box.
I then embossed card with a Brick embossing folder and die cut the door.
I also used previous die cuts, ribbon, paper and foam roses.
I have placed photos below of the products I used for ease of reference.


I glued down the embossed card covering part of the top and bottom gaps.
I painted the whole board and card with white Gesso ( I did the same with my other die
cuts, MDF bits and flowers) 
I spread texture past on the edges to smooth out the ridge of the card onto the board.
Once this was dry I spread Crackle paste randomly over the board.

Once the crackle was dry, I stencilled Modelling paste onto the board and the door for 
additional texture. Once dried, I coloured the Board and Door with Dye sprays - Mixed Media & 
Lindy's Sprays.


I added several layers of colours (colours are listed in the photo under products used)
Drying in between each layer of spray colour. I used the Black Water colour pencil and 
a thin paint brush to highlight the crevices in the stones. 


Once I was happy with the colours, I decided on what embellishments to use and 
where they should go. 
BUT I forgot to mention that I heat embossed some flower stamps with white embossing 
powder: 


REMEMBER: You can use white gesso to lighten the colours if you feel they are too dark. 
Just rub a little over the area and the gesso will absorb the colour and look lighter. If you 
add Gesso and you want it to stay white (to highlight) you need to dry it quick once added so 
it does not absorb the colour underneath. 


Once I had an Idea of where the embellishments should go, I glued the door onto
box board to give it a lift and then adhered it to the board. I used this as my main
focus point and built around this.


Once my enbellishments were glued down, I then coloured my flowers with #lindyssprays
and #imaginationcrafts Mixed media sprays. I did this so I could get the colours to flow
from the board underneath to the flowers, Some roses have two different colours, as I
let the one colour "bleed" onto another flower and blended the colours. Both these Dye
sprays are water based and blend well with eachother. If the colour you have used is too
dark, just spray it with water and dab the flower with kitchen towel, it will lift some of the colour.


I must confess that the MDF and Resin moulds were initially pink, but it was too bright, and I
thought of adding green, but mixed a little of lindy's poppin pink spray with My Mojito Green
and I got this awesome purple colour - the colour was delicate enough and looked great.
What a lovely accidental mix 😏

I did have some embossed die cuts in my stash already - so I was happy to use these in my
project.


Once the flowers and embellishments were dry, I added white glitter, Decorative Glitter Sand
and small art stones with Gel medium.

I used #NUVO expanding mouse - Worn linen, on my finger and highlighted the stencilled
texture and the the tips of the flowers, as well as the MDF and resin embellishments.

Least but not last - I added my words/phrases that I printed from the web. I edged the phrases
with #Ranger Distress Ink - Vintage Photo. I used carton cut offs to lift these off the board.

Once the phrases were adhered to the board, I used the Water colour pencil again (black)
with a thin paint brush to create a shadow underneath the words, hightlight the borders of the
door and the edges of the board.

And Voila.....


I had so much fun creating this project.

Here are some close ups


Here are some of the products I used:


#crafterscompanian


#imaginationcrafts  #Pebeo (white Gesso)


#lindys - Poppin pink, Whale watch blue, Mojito Green, 
Claim bake beige, See grass green

#MixedMediaInkSpray - Dark brown, Black, Light green, 
Green, Yellow.

Join in the fun: 

 MMP Mood Board Challenge - December 2019

Please click on the Moodboard to visit the challenge and see amazing inpiration. 

I hope you will feel inspired to play along or just create in your space. 

Wishing you a lovely New year ahead

Loves 
Candace 

Saturday, December 7, 2019

Love what you have...

Hello happy crafters

I hope you are keeping warm this weekend, it has been a cold one in the UK.

Today I am sharing a layout page I created. I wanted to try some light pastel colours,
which is not normally my thing. I like the strong colours, normally green and brown, but
it is to be expected with just having boys 😁


I created this layout with a specific photo in mind. One of my Sister-in-law. How
beautiful is she? My brother, sister-in-law and gorgeous nephew live in SA, so I
love the photos I get. The wording I used I thought was just so perfect.

What more could you need?

I started with distressing a patterned paper and using brown and black ink to chalk
the edges.


I used Pebeo modeling paste and stencil to create abit of texture.
I then sprinkled some Lindy's Magicals on the page and added water with the
spray bottle to allow it to run. I added more water where necessary to lighten
the colours. I did not want to add to much as I wanted the pigments of the magicals
not to mix too much. #lindysmagicals  Bachelor button blue, Mission bells brown,
Urban amethyst. Keeping the pigment from not mixing too much, gives the different
colours from one Magicals pot.


I added a few white splatters before carrying on. I used White Gesso and dried the gesso
quickly so not to absorb the colours underneath.

I then printed out some flowers and fussy cut them out.


I heat embossed some die cuts and MDF's - I used Lindy's embossing powders and
Crafters companium embossing powders. I am missing parts of the labels so I cannot
confirm the colours - due to being used often and covered in some type of medium 😬
#crafterscompanion  #embossingpowder #lindysgang


The "whitish speckled" embossed die is due to me using white and silver embossing powder
together and then putting it in a separate pot as it was mixed, it laso had a little pink and blue
too, as I added the mix to this pot as well. It actually looks amazing.


When the page was dry, I placed the die cuts and mat for the photo on the page so I have an idea of the type of layout I wanted. I wanted to lighten the background colours abit more. As I said
I am trying the pastel colour theme πŸ‘†.


I watered down some white gesso and lightly painted over the background. Dried with a
heat gun.


You can still see the pigments that have not mixed yet - its amazing.

I used gesso on my finger to rub over the paste, to highlite it more.

I glued down my embellishments (die cuts, mdf's, fussy cut flowers and the mat for the
photo. I used carton to lift some of the embellishments and the photo mat.
I added some glass glitter to the page with gel medium.

I then lightly stamped around the page using 49market stamp.


I printed the photo and distressed the edges and chalked the edges with Brown and Black ink.


And here is the finished work of art:


Here are a few close ups


I am participating in Lindy's December challenge and I have shared this layout for
the competition. Please click on the link below to view the wonderful creations and the
competition details. Please join in. It is always very interesting and fun to
challenge yourself. 


Loves Candace

Inspiration - all around us

Hello Happy crafters.

I hope you are settling in well with Winter now set in.

I know it has been a while since I have posted, and apologies for that. But the time has passed by
so quickly and honestly ... I lost my creative mojo 😱. I just felt I wasnt good enough, my creative
work is is no comparison to many out there.


Thank you though to the so many wonderful crafters/creative individuals out there, who are always so inspiring. I felt really uninspired and no care of crafting.... How bad is that. Im sure there
are many of us out there that do get this stage. Perhaps just busy work/home life, trying to keep
up with things that need to be done, and if you dont do it, it doesnt get done.

However after surfing the web and watching some awesome tutorials on blogs and Youtube,
I felt inspired to try some mixed media experimenting.


Thank you to #Maremismallart - Marta, You got how I felt. I felt so much better after watching your video. I decided I create for me. I create for my benefit, I create as it is my hobby and what I love to do.

Please see the link below to the Youtube video that is very interesting and got me inspired after
trying my own Medium challenge.

I started out by cutting foam core into small squares, probably about 11cm x 11cm.

I then used Pebeo High density Modeling paste and different stencils to create the various backgrounds with different mediums.


Here are some closeups


On these boards, I used black gesso first and then added the stenciling with paste


Here is a board where I used two stencils. Bricks first and then metal plate after.


While the paste was drying, I grabbed all my different mediums I wanted to try.

Here are some pictures of the different mediums I tried and the boards.

I used metallic acryllic paints here - dont forget your spray bottle filled with water.
This will water down the paint and and allow it to flow.


On the board below I used Airondack alcohol inks and Alcohol Blend solution to 
allow the inks to mix and flow over the board.
#airondack


On the board below I used Distress paint. Settling little blobs on the board and using my water spray to mix and blend the paints. Start off with a little first, and the lightest colour first. 
#timholts 


Here I used the Nuvo Expanding mouse as my next medium, it is water soluble and is a great paste to use on stencils, whats even more amazing is what happens when you heat it 😁
I used Mauve and Red. 


Below I used Lindy's Sprays. I chose autum colours here. Did My mix and dried with the heat gun.


I also used the following mediums on the other boards: 
Gelatos on one and Mixed media ink spray by Imagination crafts. 

For the finishing touches, I printed some coloured butterflies on board paper and then on tracing paper (vellum) and fussy cut them out, as well as some sayings. I glued them down.


Here are the finished boards below: 


Here are a few close ups:


I hope you enjoyed this post and feel the creative inspiration. If you feel that you just dont
have that craft mojo, pull out some stash and just experiment. I do it often in my journal. 

Please enjoy the video below and have some fun.


Loves 
Candace