
Facial Tissue Flower
by Joanne Allison
Fold and tie paper tissues together to create a gorgeous flower.
Supplies
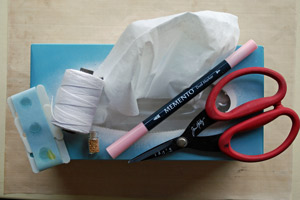
- Facial tissue
- Thread or florist wire
- Strong, sharp scissors
- Marker (Memento Angel Pink used here)
- Flower center (glue dot coated in microbeads used here)
Step-by-Step
-
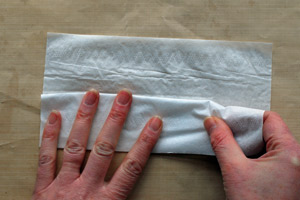
Step 1
Cut tissue into strips 2" wide. As a regular tissue is about 8", an easy way to do this is to fold it in half, fold each half back on itself and cut along the fold lines.
-
Step 2
Stack three of the strips together, discard the last strip.
-
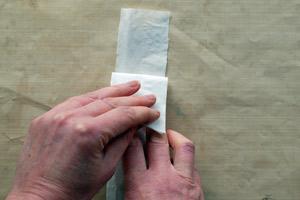
Step 3
Concertina fold along the length of the stack – aim for somewhere between 1/4" and 1/2" for your fold.
-
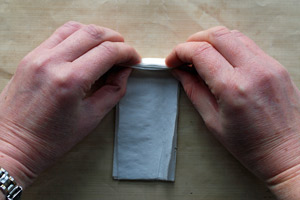
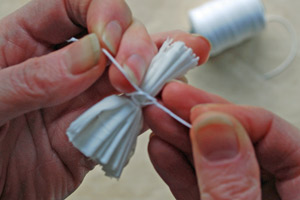
Step 4
Wrap thread around the center of the folded piece and tie off (or use florist wire if you find that less fiddly). Trim the thread ends.
-
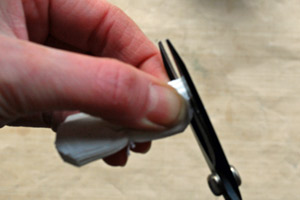
Step 5
Using strong, sharp scissors as there are multiple layers, round off each end of the strip.
-
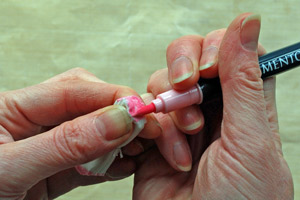
Step 6
Run a marker around the cut ends (any kind of marker will do) and allow a few minutes to dry as the moisture will make the tissue more delicate.
-
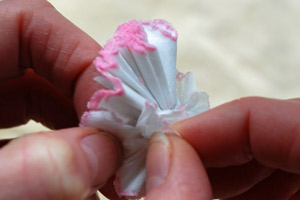
Step 7
Fan the piece out around the tied center to make a circle.
-
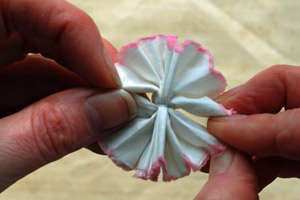
Step 8
Gently pull apart the tissue layers (there will be six layers in all).
-
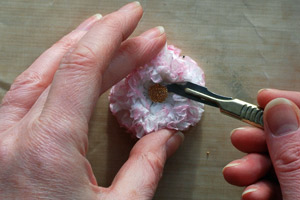
Step 9
Add a pretty center to finish the flower. Add a dab of liquid adhesive if you use a glue dot as the base for your center to make sure it stays stuck to the tissue surface.
-
Step 10
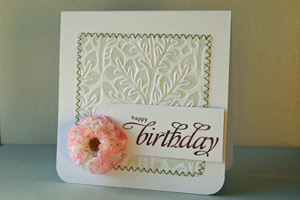
Use liquid adhesive to add the flower as an embellishment on a card, gift package or other papercrafted project!
No comments:
Post a Comment