Saturday, May 30, 2020

AUTHENTIC YOU

Hello happy Scrappers

I hope you are all well and keeping safe and crafting up a storm.


Today I am sharing a layout I created which was inspired by the Morethanwords May Challenge 
– click on the linked image below and it will take you to the challenge. Check out the work by the DT’s – inspiring.
 https://morethanwordschallenge.blogspot.com/2020/05/may-2020-main-challenge-funny-stripes.

I was inspired by the word Funny and Stripes. My son had to participate in a mini challenge with his company for team building during the lock down – pretty cool online lockdown challenge.
They all had to create a little video doing something funny with a Sports theme and they could dress up, paint up etc. My son is always up for a challenge and is such a funny kid, always has a positive outlook on life and it is contagious.


I used the following products:

49 Market crackle texture stamp set
49 Market texture stamp set
Memento tuxedo black ink
Papermania embossing powder – Seafoam white
Ranger Inkssentials Emboss it ink pad
Fabscraps sticker transfers : All Boy
Mutton cloth
Resin embellishments – homemade with silicone molds
Paperartsy Infusions

Process:

I layered striped paper onto card stock and matted the photos onto cardstock the same colour as the stripes. I stamped the background with #49market Gabi’s crackle texture stamp set using the crackle stamp with blank ink. I then used the Brick stamp from the #49market Gabi’s crackle texture stamp set with embossing stamp pad and used Sea foam white embossing powder – heat emboss.


I created some tags, using stamps and inking the edges. I used the die cuts from the FABSCRAPS High tea journal tag collection and I used some resins that I made previously to embellish the layout.  I used word transfers that I matted onto patterned paper.


I did try different placing of the tags and photos until I was happy with the layout.


I adhered the photos to the layout using carton to lift them off the page. I then glued down the tags and embellishments. I used pieces of carton on Some of the tags to lift them too. I added strips of mutton cloth coloured with Infusions dye ink powders (with a little water)

Here are a few more close ups of the Layout


Thank you for popping in

I hope you will take part and have some fun creating.

Take care

Loves
Candace

Friday, May 15, 2020

Making Music too


Hello Happy Crafters

I hope you are all well and staying safe.

Today I am sharing a project I created for the second time as I was inspired by
the #MIXEDMEDIAPLACE April 2020 Moodboard challenge. I love the colours
and inspiration.


You can find the template on my previous post: Making Music @ home             

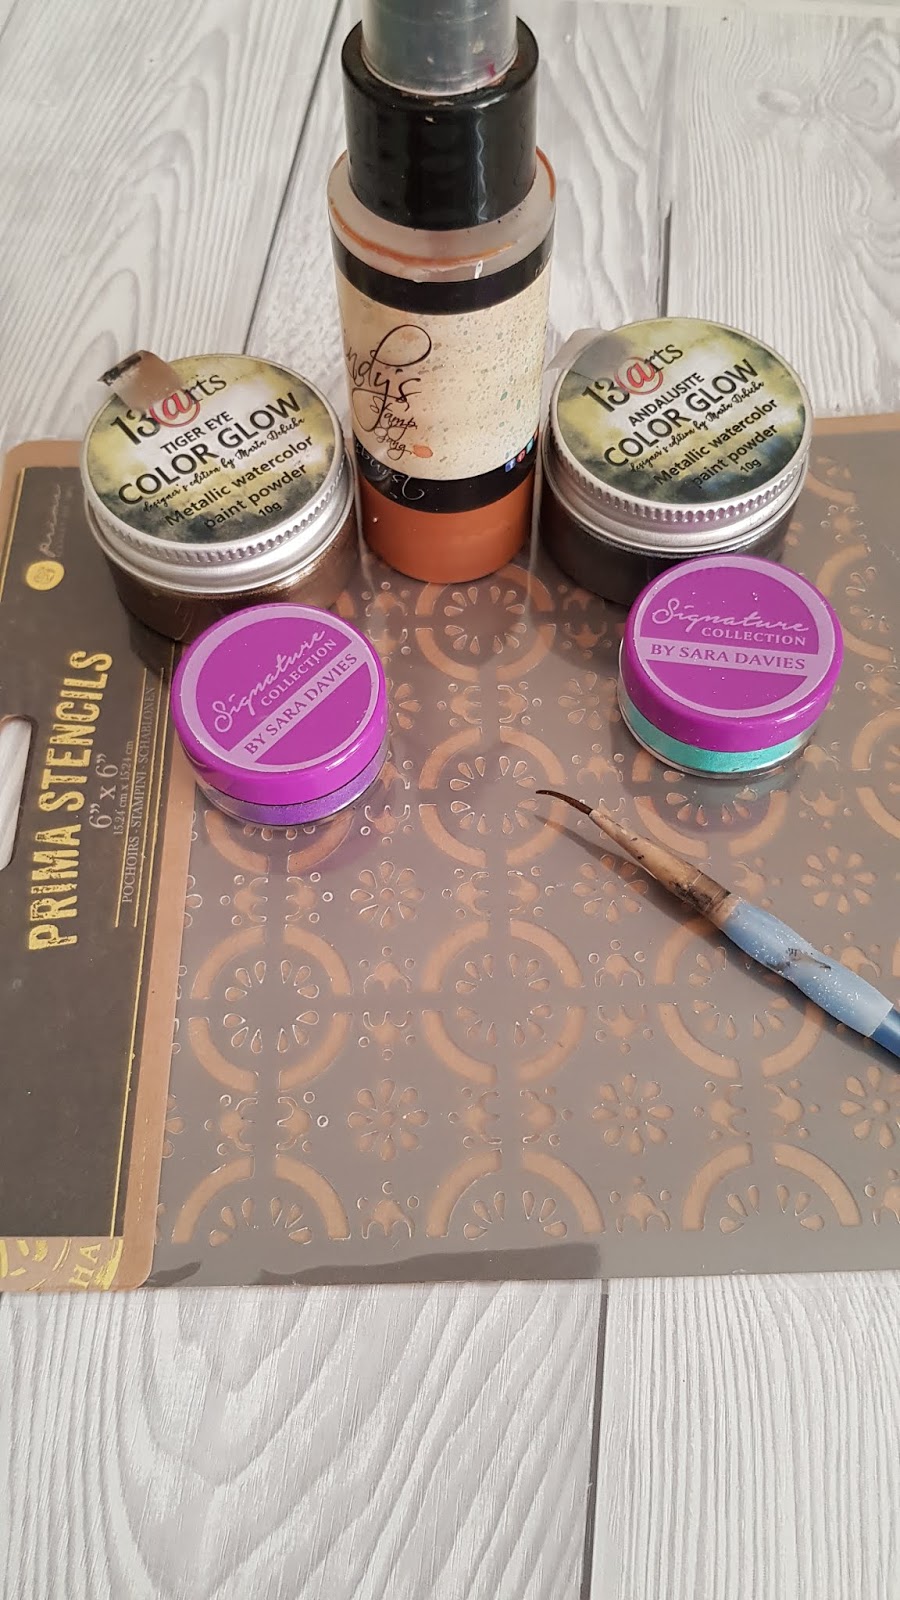
These are some of the products I used: 


For this project I used cardstock and the glue gun to stick it together.
I did not want the violin too thick so I cut strips of cardstock measuring
1cm for the side panels.


For the background I painted the violin with green acrylic paint and once
completely dry, I used the crackling method with glue mix – which you can
find here on my blog: Cracking Tutorial

I used white Gesso as the top coat.


Once this was dry, I added some stenciling with #Pebeo modelling paste and
#prima stencil. Once dry (using heat gun 😊 I added #Lindy’s starburst spray –
A bit o bubbly and embossing with #signaturecollection embossing powder from
#crafterscompanion.  


I placed my embellishments where I wanted them so I am happy with the layout.
The flowers are handmade – I used foamarin to make the different styles.


I made some clay embellishments with silicone molds and coloured these with
#13@rts #colorglow. I added some embossing to a few of the clay molds.


Here I added some more #13artscolorglow to the background for more colour.
I added #nuvo #vintagedrops  - pioneer green for more texture and some black
splatter with #pebeo black Gesso.


Finally I inked the edge of the violin with tuxedo black #memento ink and
Lightly touched over some of the embellishments. I also added some dark
Shadow around some of the clay embellishments with watered down black gesso.

Here are a few close-ups:


Please check out the MMP Moodboard challenge, I found it very inspiring and lovely
colours especially being in spring in the UK. Click on image to be taken to the challenge.

 Mixed Media Place - April 20 Moodboard

Thank you for popping in and I hope you will be inspired.

Have fun

Loves
Candace

Friday, April 24, 2020

Making Music @ home


Hello happy Crafters

Thank you for joining me today.

I thought I would share a project with you that you can make at home. I know 
some may feel a little down due to being indoors for so long and the weather 
being so lovely outside here in the UK. But to lift your spirits and bring a little 
joy lets make music:


Try different mediums and please share it with us.

#stayhome
#makemusicstayhome

I have a large file where I keep images of crafting ideas, so when I need some 
inspiration or ideas on crafting and additional techniques I can brush up on or 
try out, I go to my file.

I saw this beautifully decorated mixed media Violin, and of course I did not have 
one so I decided to make one. And what does one do if you need to learn to make 
something – You hop onto YouTube. I found a video on how to make a violin using 
carton – what you really need is just the template actually, so I have attached one for 
you to use – easy peesy.


Download/save and make it the size you want. 

Violin process:

Using the template, cut out the carton pieces you need – you could use cardstock, 
foamcore or paper. For the sides, I cut strips of carton based on how thick I wanted 
the violin to be. Give the strips of carton a slight roll so it breaks the fibers a little. 
This will make it easier to follow the turns of the top and base of the violin carton 
pieces. Glue the pieces together – I used a glue gun – its quicker. But any good quick 
dry adhesive will do.


I used my usual glue and water mix (1:1) and decoupage the carton project with 
kitchen paper roll. Remember, you can use tissue paper, cigarette papers, lace etc. 
what ever you have handy. You don’t really need to do this step, but I think it seals 
it up nicely and makes it harder.


Once the violin is dry - Of course I can’t wait for it dry naturally so I used a heat gun 
to speed up the process - coat it with Gesso or acrylic paint.  

I used some scrap pieces of paper, torn into strips and glued these down. you can use 
the same glue mix, mod podge or gel medium.


I added some stencilling using the Prima Designer tile stencil and added some crackle
paste. 


Mixed Media Process:

These are the products I used.

#colorglow
#13arts
#nuvo
#Tonicstudio


First I found some embellishments and some tags and decided on a layout (make 
sure the Violin is dry and ready for the next steps)


Of course my favourite creature is the Butterfly and I always try and stick one in 
somewhere - so delicate, free and beautiful. I wanted to definitely add this feature 
in my project as I saw the Morethanwords April Challenge and had to join in as I 
love the theme. I also wanted to create a project that you could make and feel joy 
in it everyday when you see the beauty you have created. 


I added some flowers to my temporary layout - Definitely needed these as we are in 
spring and celebrating nature. I adjusted and added and removed my embellishments
until I was happy. I took a photo so I would remember how I wanted my goodies.

I removed the flowers and the tag and adhered all the other embellishments. Then
we start creating. I sprinkled "a little bit of that and a little bit of this" of the 13@rts
color glow, add some squirts of water and let the magic begin. 


I love the shimmer the Colorglow gives. You can use Lindy Starburst sprays/magicals
as well or shimmer acrylic paint. Water down the acrylic paint and add it with a paint
brush, if necessary add a little squirt of water to mingle it on the project. 

Dry with heat gun - not too close :)

I add some extra colour where I need to and remove a little with a wet wipe. 

Once the inks were dry, I used my finger and some white Gesso to highlight the 
stencilling and embellishments. Do sections at a time and dry the Gesso as you finish. 
This prevents the Gesso from mixing with the ink and keeps it white.


I then added my take and flowers. I inked the edges of the violin with black ink
and brushed the dauber over the flowers as well to highlight the edges. I also
painted a few of the embellishments with silver. 

Here are a few more photos: 


I have entered this creation into the More than Words April challenge. 
Please click on the image below for the link to the competition and some 
wonderful inspiration.

 More than words April challenge

Thank you for joining me and I hope you feel inspired to make your own music

Take care and stay safe 

Loves Candace